


How to connect to WiFi in Win7 Ultimate Edition? How to connect to WiFi in Win7
Nowadays, many people have WiFi installed in their homes. There is no need to use network cables. Only a wireless network card can allow computers to access the Internet. It is simple and convenient, but many users do not know how to set it up. The editor below will explain to you how to connect to WiFi in Win7 Ultimate Edition.
The details are as follows:
1. If it is a laptop, click the WiFi icon in the lower right corner to select the wireless connection you want to connect to, and enter the password to connect directly without setting up.
2. If you are connecting to WiFi from a desktop computer, you need to install the wireless network card and driver, and then set it up to connect to WiFi. First open the control panel;
3. Change the view mode to small icons and select Network and Sharing Center;
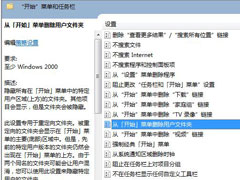
4. Click Manage Wireless Networks on the left;
5. Click Add, a manual connection to wireless network window will pop up, select the first manual creation;
6. Enter the wireless network to be added and it will be OK.
The above is the detailed method of how to connect to WiFi in Win7 Ultimate. Is it very simple? Users who cannot connect to WiFi can follow the above steps.
免责声明:All articles and pictures on this site are from user sharing and Internet collection. The copyright of articles and pictures belongs to the original author and original source. They are for learning and reference only. Please do not use them for commercial purposes. If your rights are damaged, please contact the website customer service.

